Building a workshop
Having become frustrated with building stuff on the dining room table, I finally decided to outfit a decent workshop. It’s a small place; so the workshop won’t be anything too grand, but any space to work is better than no space.
I’ve been at it for a bit now, and I keep forgetting all the effort that has gone into it. To be able to look back and remember, I thought it would be fun to throw together a timeline with what photos I have.

First, of course, was to add some electrics and tune up the insulation. This involved stripping out the interior walls, wiring, insulation, and then putting it all back together. Painting the walls and ceiling. Then, finally, adding the switches and sockets. Sadly I didn’t take many photos. In fact, I have one somewhat fuzzy one, but at least it serves as a bit of a reference.
Next up was the floor, it was bare concrete and somewhat crumbling, so I filled it in and painted it. It looks lovely, but it was rather an error. Once I started using the workbench (more on which later), I discovered that the painted surface is stupidly slippery. At some point, it’s going to need a new topcoat with something grippy in it… but by now, of course, the shed is full of stuff.
Here it is after the first coat.

Clearly, the walls by this point had taken a bit of a beating. Don’t worry, they got a fresh coat of paint. Strangely I didn’t take any pictures of that either.
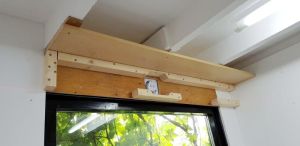
The next project was to add some ventilation. A complex problem because the only logical extraction point was above the window, which interfered with the shelving I wanted to build there. Eventually, I ended up with some plastic ducting to the extractor fan, then a wooden box duct to the shelf, and some ventilation slots in the shelf. Oh, not forgetting, of course, the second set of ducting that leads down to some inlets just below the bench… which I plan to use eventually for the dust extractor system. One day…
The basic ducting:

The structure of the wooden ducting, showing the top shelf:
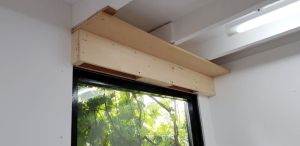
The outer case, which directs the flow from the lower shelf:
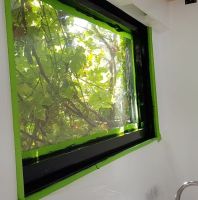
A quick break to paint the window frames before I blocked off the access with the shelf:
And finally, the lower shelf, showing the ventilation slots:
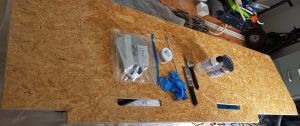
The OSB didn’t really fit in with the clean black and white colour scheme, not to mention the number of times I got a splinter handling it. For ages, I wanted to try resin coating something… this seemed like a great chance to kill two problems. So over several days, I coated it repeatedly with a white epoxy resin. This stuff turned out to be really challenging to get a good finish on 🙁 Luckily, it’s a shelf in a workshop… so I can accept something less than perfect.
About to apply the resin:
An intermediate coat:
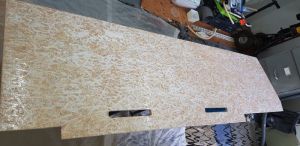
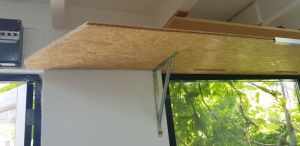
Mounted, with the last coat… came up quite shiny. After this, I went back and filled the air gaps with silicone, but again I didn’t photograph it, apparently.

I took a short break to paint the support brackets, it just looks better and if I’m going to spend some quality time out here… why not?
Finally, the shelf is mounted. Clearly, I’ll need to do something about the edge, probably an aluminium casing. Still, I’m not sure how it’s going to join into everything else yet… so, for now, it can look a little rough.
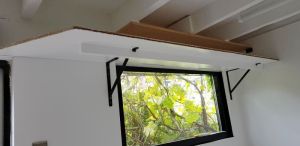
The extractor fan doesn’t shift as much air as I’d like, but a proper unit would have taken up too much space. I had to settle for something being better than nothing here.
Phew. Ventilation, upper shelving, and some nice fresh paint. Time to tackle the workbench…
At this point, I thought I could just buy a bench and be quickly on to other projects. But, of course, life is rarely that simple. First up, it didn’t stand level. Seems that only the more expensive models had the adjustable feet. So, it was out with the angle grinder to cut the legs to length.
After chopping off these little bits:
The frame stood pretty darn level, good enough that I didn’t imagine myself being able to get it any better.

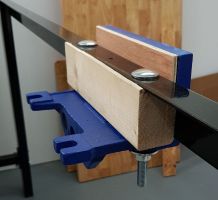
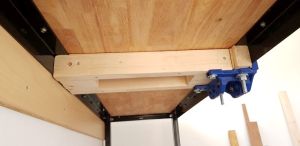
But then I realised I couldn’t fit the wood-working vice I’d bought. It mounts under the bench, but the steel frame got in the way. So, I had to fudge it.
First, I mounted the front plate to the steel frame:
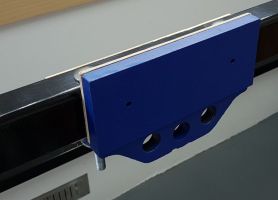
Then built a bracing structure front to back across the frame:
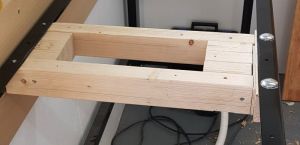
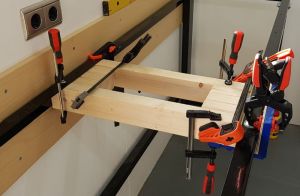
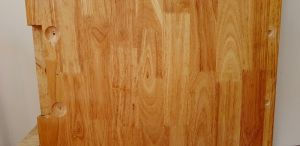
And finally hollowed out the benchtop so that it could be fitted over the new fixings.
And, naturally, failed to take any pictures of the finished job.
Never mind, I got right to work using the bench. Oh, how good it is. Working on a bench is so much more enjoyable than trying to clamp things with my knees, or work on the glass-topped dining room table!
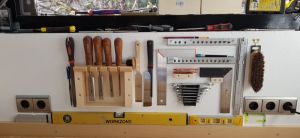
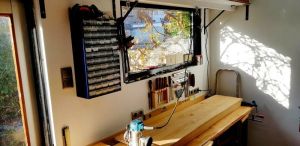
Of course, the first thing I did was to make some mountings so I could put some of my most used tools up on the wall. It’s a bit of an ongoing project still.
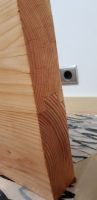
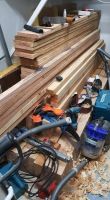
Having got these tools up, I then made something of an expensive error. I concluded I needed lots more shelving in the workshop. Tools and parts are piling up on the floor. So I ordered some fine sawn wood… or at least I thought I did. Turns out I mistranslated and ordered a massive pile of rough sawn wood. The wood is lovely, but I’m really not set up for processing it.
Just some of the wood:
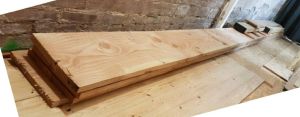
More of the longer bits laying down the back of the dining room:
I started attacking it with my #5 plane, it works, but it’s painfully slow. Not to mention bloody hard work! I tried sanding it with a very coarse grit belt for the belt-sander. Again, it works, but it is crazy slow and loud – not ideal for an inner-city location. So I built a crude router-sled and machined down a couple of beams. This is also slow, and exceedingly hard to get right. The beams are longer than the workbench, so I have to do it in multiple phases, and getting the cutting depth to accurately match up is challenging. Arg.
Working two beams at once with the router-sled:
Sooner or later I’ll probably have to buy a thicknesser, I’m just not sure where to use it. The workshop isn’t really long enough.
For now, the most effective solution is the hand plane. It might just take a decade or two to finish the job 🙂
One machined beam showing the tongue: